Settings for Instructions to Users
You can configure instructions for assignees for each status. When you use this setting, assignees can check the instructions, which helps work proceed smoothly.
What you can do with the instructions for users
You can use the Description for Assignees setting to provide assignees with instructions, precautions, and other information related to their tasks. For example, you can write the key points to check and actions to take in the "Approver Confirmation" status to help approvers proceed with their tasks smoothly.
The description that is set can be checked on the "Record Details" screen by the specified user who is the assignee.
For details, refer to the following section:
Displaying Instructions for Assignees
Steps
This section describes the steps to set a description for assignees on process management statuses.
-
Open the "Process management" screen in the desired app.
-
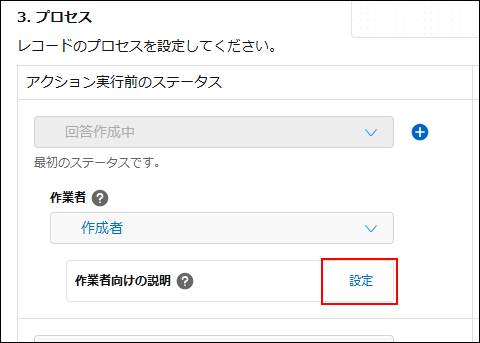
Click "Settings" in "Assignee instructions" for the status where you want to set instructions in "3. Process flow settings".
-
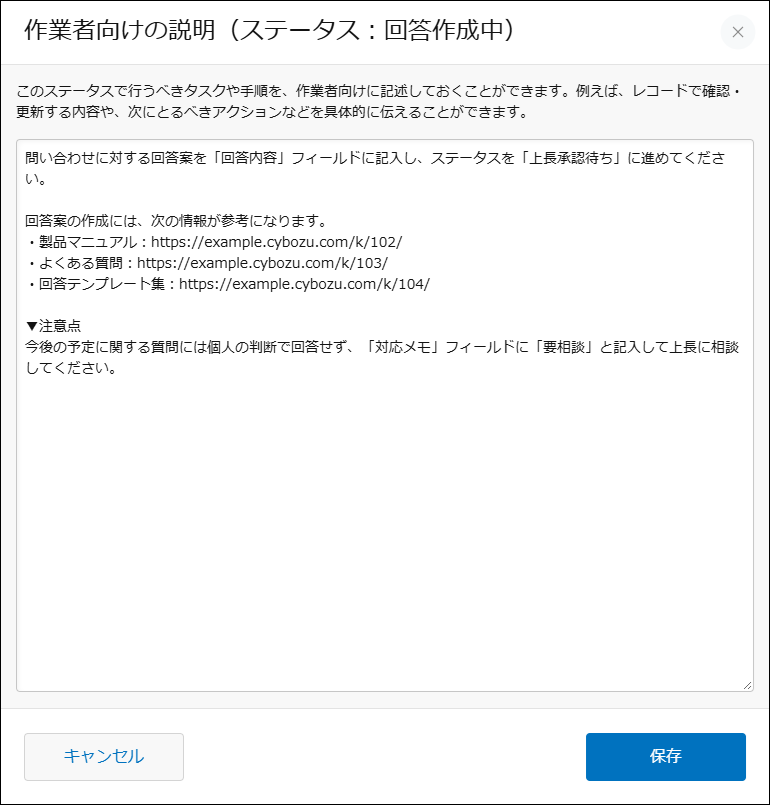
Assignee instructions Enter instructions in the dialog.
For examples of what to enter, refer to the following section.
Example settings
-
Click "Save".
The beginning of your description will appear in the "Assignee instructions" section of the status you set.
Example settings
Write specific details so that assignees can read the instructions and start working on the task right away. For example, describe what actions to take on which fields, what actions to execute afterward, and any precautions to take during the work.
If you also include URLs of Kintone apps, records, etc. that you want the assignee to refer to, or URLs of related documents, the assignee can quickly find the information they need.
This section describes how to write descriptions for each status using a "Inquiry" app and a "Request" app as examples.
Example of the "In Progress to Answer" status in an inquiry app:
Enter a proposed solution to the inquiry in the "Answer" field, and then change the status to "Waiting for Manager Approval".
The following information is helpful for creating suggested answers:
・Product manual: https://example.kintone.com/k/102/
・Frequently Asked Questions: https://example.kintone.com/k/103/
・Collection of answer templates: https://example.kintone.com/k/104/
▼Note
For questions regarding future plans, do not respond on your own. Instead, enter "Pending Discussion" in the "Action Notes" field and consult your supervisor.
Example of the "Pending for Approver" status in a request app:
This step is for reviewing the request details and then approving, sending back, or rejecting the request.
■1. Confirm the details of the request
Confirm the details of the request from the following perspectives:
• Whether the purpose of purchase is clear and the purchase is necessary for work
• Whether the "Amount" is within the budget of the department
Reference: Department Budget app: https://example.kintone.com/k/201/
• Whether a quotation is attached if the amount is 100,000 yen or more
■2. Moving the Status Forward
Perform one of the following actions based on the result of your confirmation:
- If there is no problem:
Click the "Accounting Confirmation" button.
- If there is a problem:
Enter the "Reason for Rejection" and click the "Reject" button.
- If you do not approve the purchase itself:
Enter the "Reason for Disapproval" and click the "Disapprove" button.
* Note that the request cannot be submitted again after disapproval. If the request can be handled by making changes, reject it instead.
Display instructions for assignees
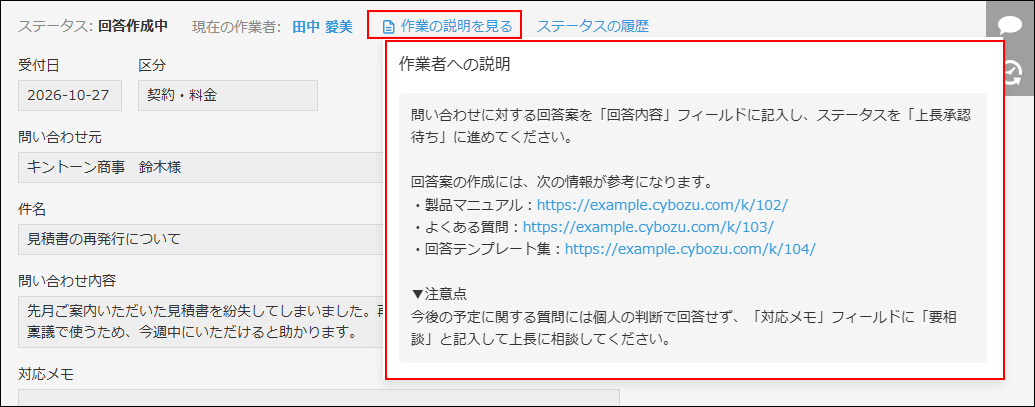
The description for assignees that you set can be checked on the "Record Details" screen by users who are assigned as assignees in the status.
On the "Record Details" screen, clicking "View instructions" next to the status will open a pop-up showing "Instructions for assignees".
Clicking outside the
"Instructions for assignees" pop-up will close the pop-up.