ファイルにデータを書き出す
This article explains the steps to export record data to a file.
The following is the overview of the steps.
Before you export data to a file, make sure to read the following article.
Notes on exporting records to a file
For details on the types of data that can be exported to a file, refer to the following page.
Import/export of app data
Narrow down the records to only those to be exported to a file
You can export records that are displayed on the View screen.
If you want to narrow down the records to only those to be exported to a file, carry out one of the following before performing the "Export to file" operation.
- Click the Filter icon and specify filter conditions.
Filtering records to display in the view - Select a view in which filter conditions are preconfigured.
Configuring views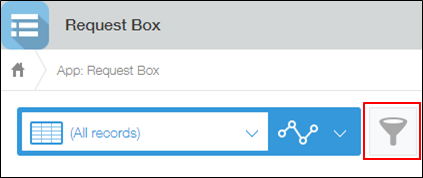
Items to be exported can be changed in the step to export data to a file.
Export data to a file
Select items to be exported and specify an output format. Then, export data to a file.
For how to reorder items to be exported and details of output options, refer to the following page.
Notes on exporting data to a file
-
Make sure that the records you want to export are listed on the View screen.
-
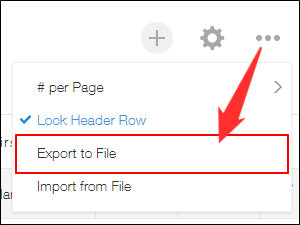
Click the Options icon at the upper right of the View screen, then click Export to file.
-
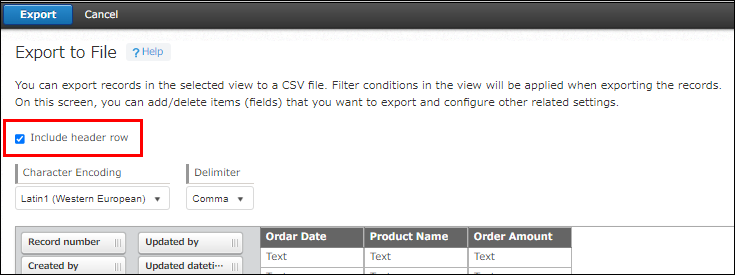
On the Export to file screen, specify what to export to a file.
If you want to export item names in the header row, leave Include header row selected.
Exporting item names allows for automatic mapping between file items and fields when importing an exported file to an app.
-
Select character encoding and a delimiter as necessary.
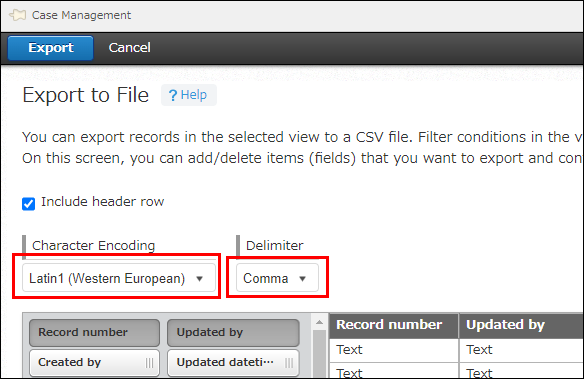
- Character encoding
You can select character encoding for the exported file.
For details, refer to the following page.
How do I specify character encoding when exporting data to a file? - Delimiter
You can select a delimiter to be used in the exported file.
If you plan to open the exported file in Excel, it is recommended that you select Comma.
- Character encoding
-
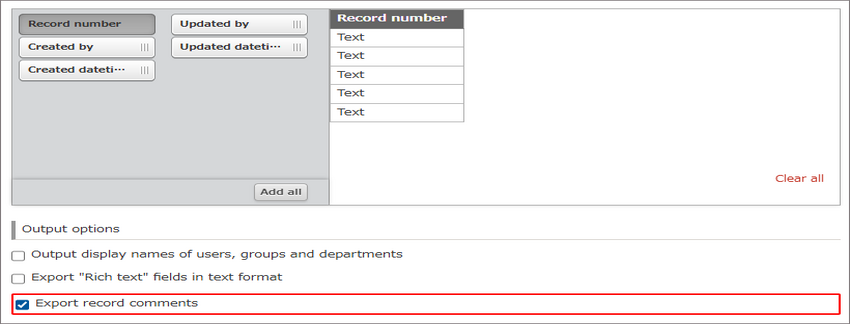
Drag and drop the items to be exported and arrange them based on how you want them to be displayed in the exported file.
 You can add or clear all items at once. You can also reorder the added items. For details, refer to the following section:
Selecting all items to be exported and reordering items -
If you want to output users, groups, and departments in their display names, select Output display names of users, groups and departments in the Output options section.
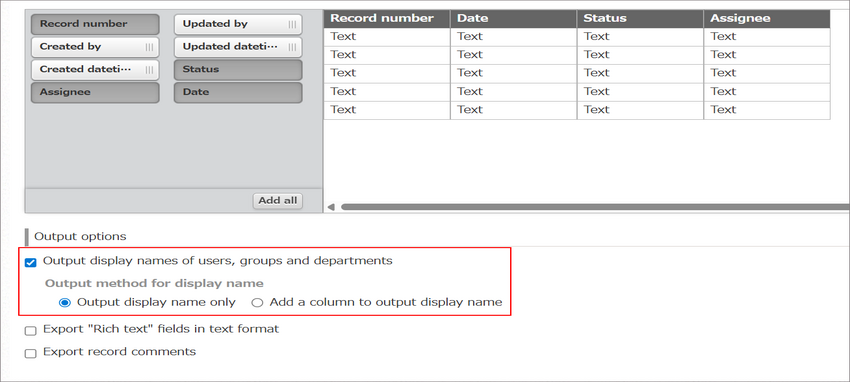 If you export data without selecting Output display names of users, groups and departments, login names, group codes, and department codes are output as users, groups, and departments respectively.
If you select Output display names of users, groups and departments, you need to select how the display names are displayed from the options Output display name only and Add a column to output display name.
For details about the output options, refer to the following page:
Exporting values for users, groups, and departments -
If you want to export the content of Rich text fields in text format, select Export Rich text fields in text format in the Output options section.
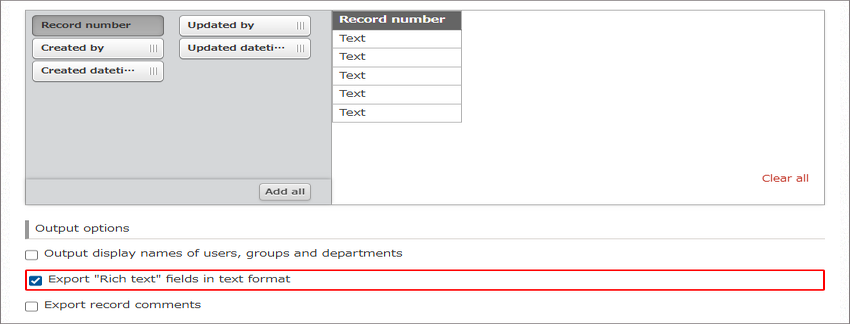 If you export data without selecting Export Rich text fields in text format, data in the Rich text field will be exported with HTML tags.
For details about the output options, refer to the following page:
Exporting content of the "Rich text" field -
If you want to export record comments, select the Export record comments checkbox in the Output options section.
-
Click Export on the upper left of the screen.

Download the exported file
When you start the export, you will be automatically navigated to the Exported files screen.
The row for the file you are exporting is highlighted, and the screen is automatically refreshed.
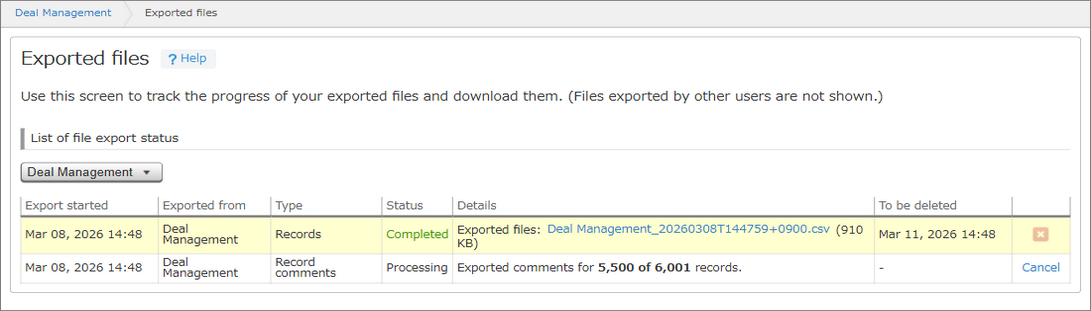
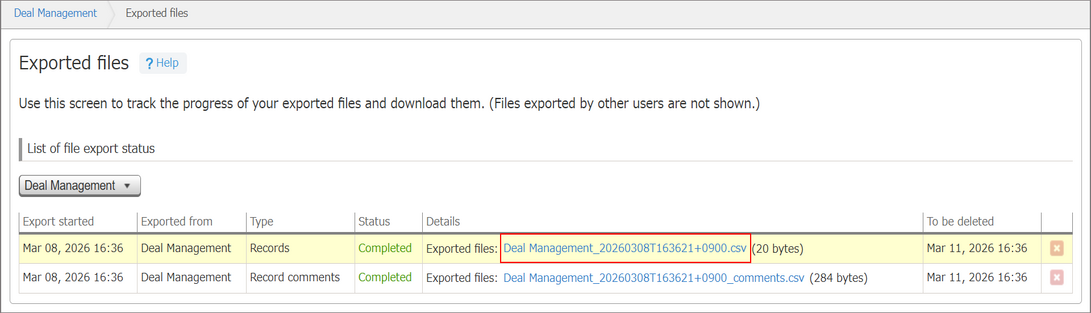
It may take a few seconds to a few minutes to export a file. When the process is complete, click the file name to download the file.
- File name of exported records: App name followed by a timestamp (Example: Deal Management_20260308T163621+0900.csv)
- File name of exported record comments: App name followed by a timestamp and "_comments" (Example: Deal Management_20260308T163621+0900_comments.csv)
For details on the downloaded files, refer to the following page:
Additional notes on exported files
Notes on exporting data to a file
Selecting all items to be exported and reordering items
- By clicking Add all, you can add all the remaining items to the right side of the already added items.
There is no need to drag and drop the items one by one. You can add all items at once.
- By clicking Clear all, you can clear all the items already added.
If you want to export only a few items or reset the ordering of the items and start from the beginning, you can clear all the added items and start over.
- You can reorder already added items by dragging and dropping.
Selecting output options
The following sections describe how the output values change depending on the output options you select.
Exporting values for users, groups, and departments
This section provides explanation of this output option with examples using a user named "Maria Jackson" (Login name: Maria-Jackson, Display name: Maria Jackson) and a department named "HR Department" (Department code: h_001, Display name: HR Department).
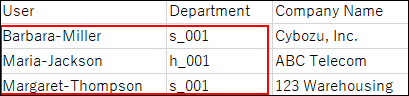
When the "Output display names of users, groups and departments" checkbox is cleared
Login names, group codes, and department codes are output as users, groups, and departments respectively.
If you export data with this option selected, you will be able to use the exported file to import data into the fields such as User selection, Group selection, and Department selection fields.
Example of the exported data:
The user will be exported with the login name "Maria-Jackson", and the department will be exported with the department code "h_001".
When the "Output display names of users, groups and departments" checkbox is selected
The display names displayed on the Kintone screen are output for the values of the following fields:
User selection, Department selection, Group selection, Created by, Updated by, and Assignee
This option is helpful when you carry out data analysis or aggregation using your familiar tools other than Kintone.
There are two ways to output display names.
- Output display name only
When exporting a file, display names are used instead of a login name, group code, and department code.
Example of the exported data:
The user will be exported with the display name "Maria Jackson", and the department will be exported with the display name "HR Department".
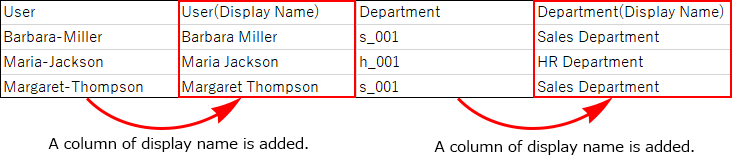
- Add a column to output display name
New columns for display names are inserted to the right side of each column for the login names, the department codes, and the group codes in the exported file. Select this option if you want to export login names, department codes, and group codes along with the corresponding display names.
Example of the exported data:
The user will be exported with the login name "Maria-Jackson" and the display name "Maria Jackson". Also, the department will be exported with the department code "h_001" and the display name "HR Department".
Exporting content of the "Rich text" field
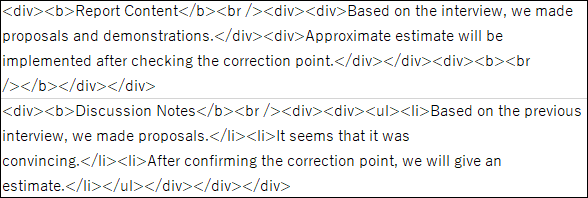
When the "Export Rich text fields in text format" checkbox is cleared
The content of the Rich text field will be exported with HTML tags.
If you export data with this option selected, you will be able to update the Rich text field data without losing text formatting and line breaks when you import the file.
Example of the exported data:
Some characters will be exported as character references.
Here are examples of characters exported as character references:
- Some full-width symbols, such as &¥()*+-/:;<=>?@~|
- Some half-width symbols
- Full-width alphanumeric characters
- Half-width katakana, and others
In addition to characters and symbols listed above, some other characters or symbols may be converted to character references.
When the "Export Rich text fields in text format" checkbox is selected
The content of the "Rich text" field will be exported without HTML tags (in text format).
This format is useful when you want to view or edit the content of the Rich text field exported to the file.
Example of the exported data: