Creating thread actions
The fields you can specify as target fields for copying data vary by the type of data that you want to copy.
The actions you create can be used from the menu that appears when you click Action on the comment of a thread, People page, or message.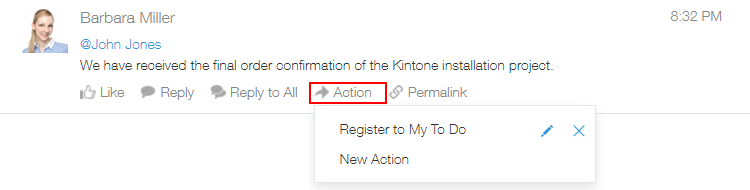
The types of data that can be copied with thread actions are the text of a comment, the date and time at which the comment was posted, the name of the user the comment was posted by, and the comment's URL.
The fields that data can be copied to vary by data type.
Before creating a thread action, make sure the field that is needed for copying the relevant data has already been placed on the app form of the target app.
Field that can be set as the destination field
Steps
The following example shows how to create an action for copying a comment's text, posted-by user, and URL to the To-Do app.
-
Hover the cursor over a thread comment and click Action.

-
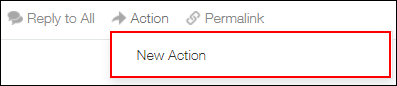
Click New Action.
 Next, we will configure the action.
 -
Under Name, enter the action name to display in the action menu.
In this example, we will enter "Register to My To-Do".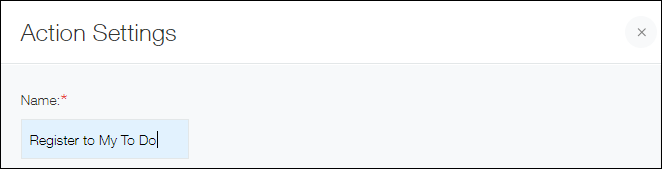
-
For Target, select the app to which the data is to be copied.
In this example, select the To-Do app.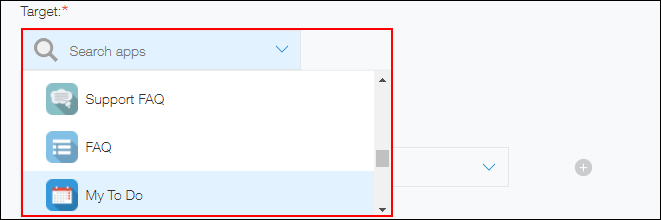
-
Under Field Mappings, specify the type of data you want to copy and the target field you want to copy the data to.
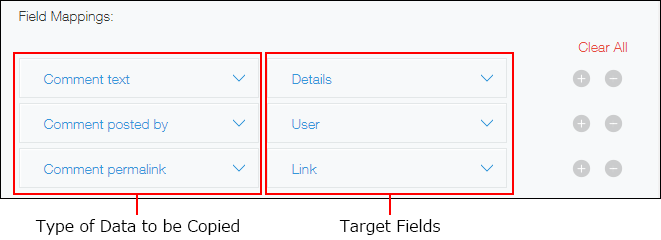 You can also click Clear All to delete all of the mappings you have already configured.
 -
Under Available To, you can specify the users for whom you want the action to be displayed.
Add any users, departments, or groups to whom you want to make the action available as necessary.
 If you add departments or groups, the action you created will be available to all of their members.
If you want to make the actions available to all users, add "Everyone". -
Click Save.