
Using AI Voice Input for Records in the iOS Mobile App
This explains how to use the Records voice input AI in the iOS mobile app.
The entered voice is processed inside the device, and neither the voice nor the spoken content is transmitted outside.
Settings for Using AI Voice Input for Records
To use the Voice Input AI for records in the iOS mobile app, the Kintone system administrator needs to enable Kintone AI and configure the settings to use the Voice Input AI for records in the desktop version in advance.
For details on the configuration steps, refer to the following page:
Enabling Kintone AI and Selecting Features to Use
Supported Languages
The Record Voice Input AI supports Japanese and English. If you speak a language that is not supported, the AI might not be able to distribute the content into fields correctly.
The language that the AI recognizes depends on the Preferred Language setting of the Kintone app. You can find the Preferred Language setting by tapping Settings > App > Kintone.
Note that the following setting is also required to enable the AI to recognize the language specified in Preferred Language.
- In the "Settings" app, tap "General" and then "Keyboard". On the "Keyboard" screen, add the keyboard for the language you want to use.
- In the Settings app, tap General, then Keyboard, and check the appropriate language under Voice Input Language.
Supported Fields
The following fields on a record can be used as the destination for the AI Voice Input:
- Text
- Text area
- Number
- Radio button
- Check box
- Multi-choice
- Drop-down
- Date
- Time fields
- Date and time
- Link
- "Lookup":
After AI assigns values to the "Lookup" fields, you need to tap the "Lookup" button.
You cannot use the AI Voice Input feature for apps that do not have any supported fields.
Notes
The following are the points to note when using the AI for Voice Input in records.
- Notes on Recording:
-
The maximum recording time is 5 minutes. When the limit is reached, recording is stopped automatically and the spoken content is distributed to each field.
-
The following actions will stop the recording and return the button to "Start Voice Input".
- Switching to another app
- Locking Your Device
- Answering Phone Calls
What you say will appear on the screen as a transcription, but it will not be reflected in the field. If you tap the "Start Voice Input" button in this state, your speech will be cleared and voice input will start from the beginning.
-
If you reject an incoming call or the other party hangs up during the recording, the spoken content up to that point will be distributed to the respective fields.
-
- In apps where customizations that rewrite field values are applied, the content sorted by the voice input AI for records may be overwritten by the customizations.
When adding records
To add a new record by using the AI for Voice Input to Records, follow the steps below.
-
Open the mobile app for iOS.
-
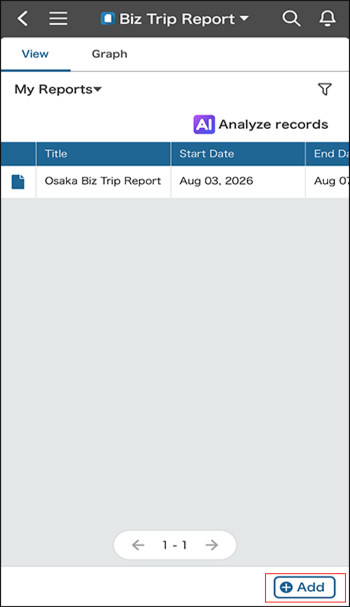
On the view screen, tap "Add".
-
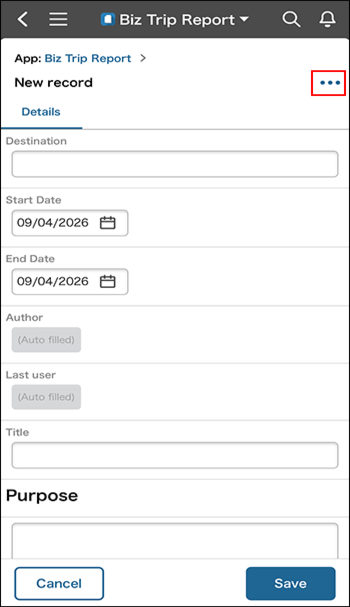
On the New record screen, tap the Open the action menu for this record button (shaped like three dots) in the upper right corner of the screen.
-
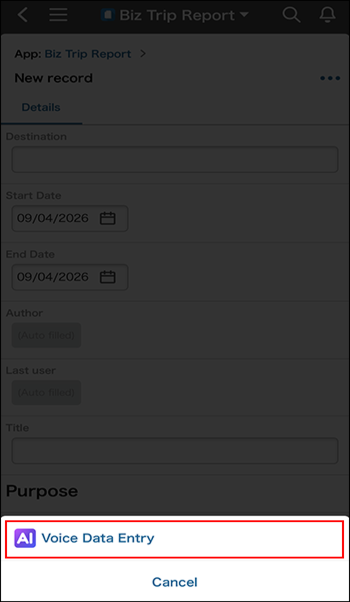
Tap "Voice Data Entry".
-
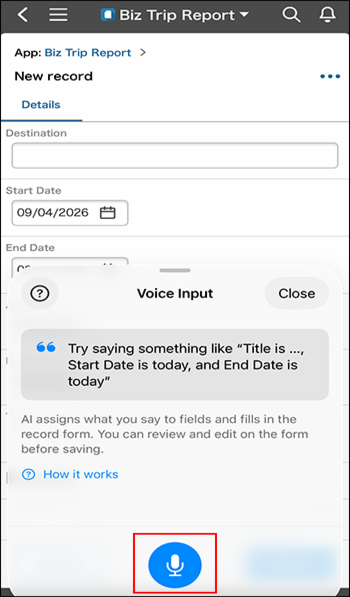
Tap the "Start Voice Input" button (microphone icon).
-
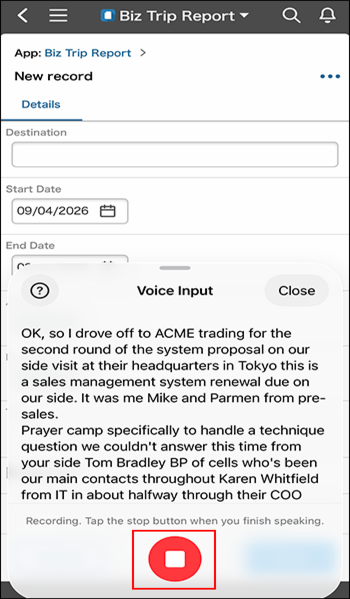
Speak freely about what you want to record without worrying about the order or how you say it. When you finish, tap the "Stop Recording" button.
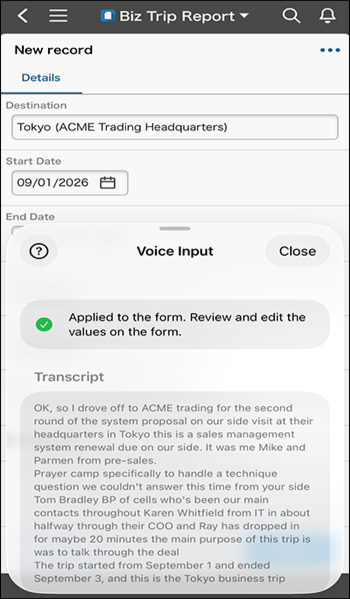
AI categorizes your spoken words into respective fields.
-
If necessary, tap a field to edit it.
-
Tap "Close" to close the "Voice Input" screen.
-
Tap "Add".
The record is saved and the record details screen is displayed.
When editing records
You can use the AI-based voice input for records even when editing existing records.
-
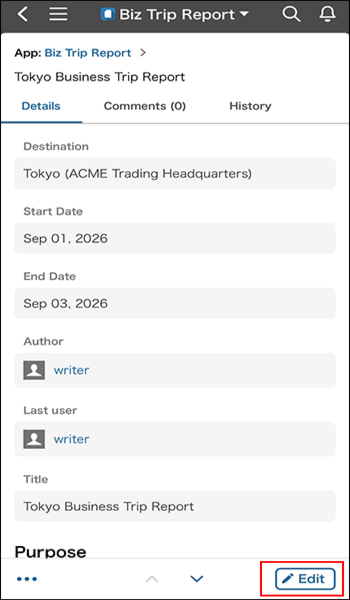
On the record details screen, tap "Edit".
-
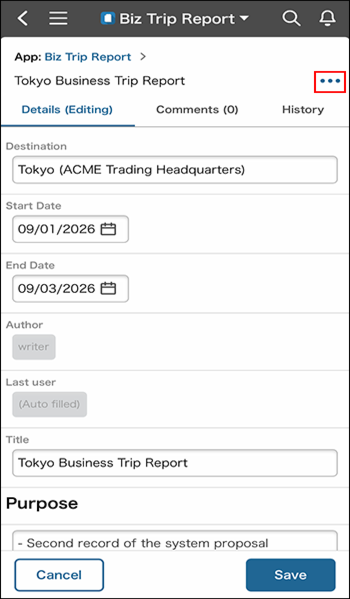
On the record editing screen, tap the Open the action menu for this record button (shaped like three dots) in the upper right corner of the screen.
-
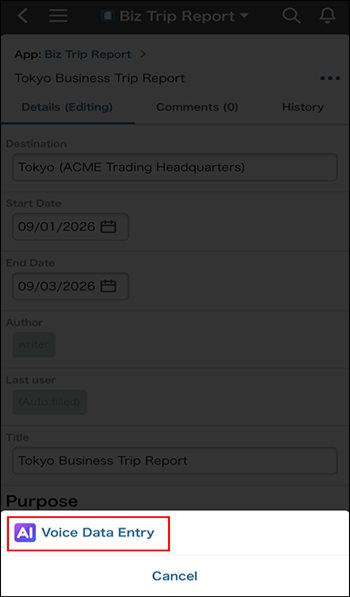
Tap "Voice Data Entry".
-
Tap the "Start Voice Input" button (microphone icon).
-
Speak the content you want to modify, and then tap the "Stop Recording" button when you finish speaking.
The AI will distribute your speech to the respective fields. -
If necessary, tap a field to edit it.
-
Tap "Close" to close the "Voice Input" screen.
-
Tap "Save".
The record is saved and the record details screen is displayed.